It can be a challenge to gain a landlord's confidence to trust you with the quick sale of their property.
But when you tell them that you're a ListGlobally Global Agent and that their home will not only be seen by the local community but will be visible to a foreign audience on 100+ portals in +60 countries, you're earning their trust. However, if you take careless photographs of their property, you'll be losing what you've gained.
Photographs are the first things a buyer sees, so attracting their attention and drawing them to click and look closely at the property listing is a crucial part of the sales process.
Before you start shooting
Without a doubt, it is essential to photograph each and every one of the property amenities correctly. Consider some very important details before you do so.
Location
Show the exterior of the property. What is around it? Is it on a wide avenue? Is it next to a park where your family can walk or play? Is it near a river, lake or the sea? And, very importantly, what do you see from the balcony or while sitting on the terrace?

Orientation
Depending on the house's orientation, at certain times the sun illuminates the rooms better, filling them with light and life. Try to show them in their best light.
Do not hesitate to visit the property more than once in order to capture the best indoor light and showcase the outdoor environment. Make your buyer want to live there by invoking a feeling or emotion from what they see in your photos.
Housing and furniture
The house is empty:
Showing an empty space that feels welcoming is not easy. Work with the light, maximizing how it fills the rooms, and avoid very dark areas. When the rooms are large, placing a suitable object as a reference will help to create a better visual.
The house is sold empty, but at the time of taking the photos it’s furnished:
This is a frequent situation. As much as possible, leave the basic furniture to serve as a size reference yet leave room to encourage the buyer to imagine the space with their own furniture. A certain amount of minimalism is required. It is important to avoid using items that are of a highly personal taste.
The house is furnished and will be sold as-is:
In this case, removing the most personal items will be enough. Highlight furnishings that make the room more unique—paintings, sculptures, and singular lamps, for example.
Cleanliness and order
Before starting to photograph, you should clean the rooms well and tidy up by removing unnecessary or distracting articles and decor.
Everything you do before taking the photo is time and work that you'll save later.
In a recent article, we explained how to get the most out of real estate photos but here we look at the topic with a slightly different lens.
Stunning real estate images
Contract the services of a photographer with knowledge in interior design and architecture. The photographer will know how to make the most of each situation and will have the necessary equipment and knowledge to provide professional results.
Photographic work does not just involve the photoshoot. Post-production computer editing will optimize the images.
Having a photographer on the team will improve your company image by showing the owner that he has trusted a specialized team. Consider the photographer as an investment that allows you to sell your properties sooner and simplify your life.
The photographic equipment
If you still feel like handling the photography yourself it is important that the result doesn't look like an amateur's work. Here are some tips:
1) Get a camera, they’re not more expensive than certain mobiles and will give you better quality and more features.
Modern mobile phones can take photos that do not require further manipulation but when you have to edit the image or enlarge it, the quality may suffer.
You don't necessarily need a professional camera worth thousands of dollars/euros. A mid-range camera with an APS-C sensor will suffice.
Camera specifications:
- The ability to photograph in Raw Image Format, which allows for post-production edits.
- Manual mode to control exposure times and apertures.
- A wide-angle lens that doesn't distort much. 18mm is usually the standard on APS-C sensors, but a 15-16mm setting is better.
- Inexpensive super wide-angle lenses and accessories that widen the angle of view can be tempting but can be highly distorted, giving unprofessional images. Some distortion is corrected with the computer but your result is sub-par.
2) A tripod will be necessary for long exposures. Place the camera on the tripod at a medium height, about one meter. Photographing at eye level, especially if you are also tall, will produce a "chopped" effect that increases the distortion of walls and lines.
- The camera should be horizontal, straight, and parallel to the ground. The horizontal position mimics our vision and is also the most common format for listing publication.
- Look for the position where you have the most significant angle of vision. Standing at the door or outside of the room, will allow you to give the impression of space in the photograph. For terraces or ground floors, stand behind the windows. Try to capture three of the four walls.
- Before photographing, observe the scene carefully: are floors and surfaces clean and tidy? Have you minimized anything that could distract the buyer's attention? Is natural light generous, filling the room with joy and life? If the answer is yes, you are ready to continue.
- The use of the flash is delicate and dangerous if you don't know how to use it very well. It causes reflections on glass and smooth surfaces that will spoil the photo. Avoid the flash by using the natural light where possible
- An image is a combination of the three factors:
- Sensitivity: sets a low sensitivity (ISO 100-200). It’ll give you an image free of "noise" and will facilitate further editing.
- Aperture: varies by lens, but using an aperture of f:4 or f:5.6 should be enough.
- Exposure: is the time that the camera will be receiving light to correctly capture the image. With the first two parameters (ISO 200 and f: 4) the camera will calculate the time required to capture the image.
- Use your camera's delay shutter to avoid vibrations when shooting.
- If possible, avoid placing the camera in front of the primary light source, such as windows. You’ll achieve light metering and a more harmonious image this way.
- Consider turning on backup lights or auxiliary lamps to get a higher light volume.
- Focus correctly and make sure the image is sharp.
- Finally, avoid being in the photo. Check the reflections on windows and mirrors – you may have taken a picture of yourself in the room!
HDR technique for indoor photography
The ideal for indoor photography is to highlight the details of both the darkest and the lightest areas of a room, while finding a harmony between the two.
The cameras' light measurement systems will calculate the average between light and shadows. If there is not too much contrast, the photos look balanced. But this isn't always the case.
Imagine a living room with a glass window that opens onto a very bright terrace. This is a case of high contrast that can cause:
- details in the dark areas and none in the bright areas.
- the interior is dim with murky details and the exterior is overly bright and detailed by contrast.
If we had to choose the first one would be more useful, but is it possible to achieve everything?
Through the regulation of our iris, our eyes can adapt to ambient light and see the details in both cases; then, our brain does the rest.
The High Dynamic Range (HDR) technique aims to mimic the natural responses of the human eye. HDR consists of taking the same photo several times without moving the camera, keeping the same ISO and aperture, and only varying the exposure time.
Here is an example. With the camera on its tripod, the image framed and focused, we use the delayed shutter and take three photos with the following variation.
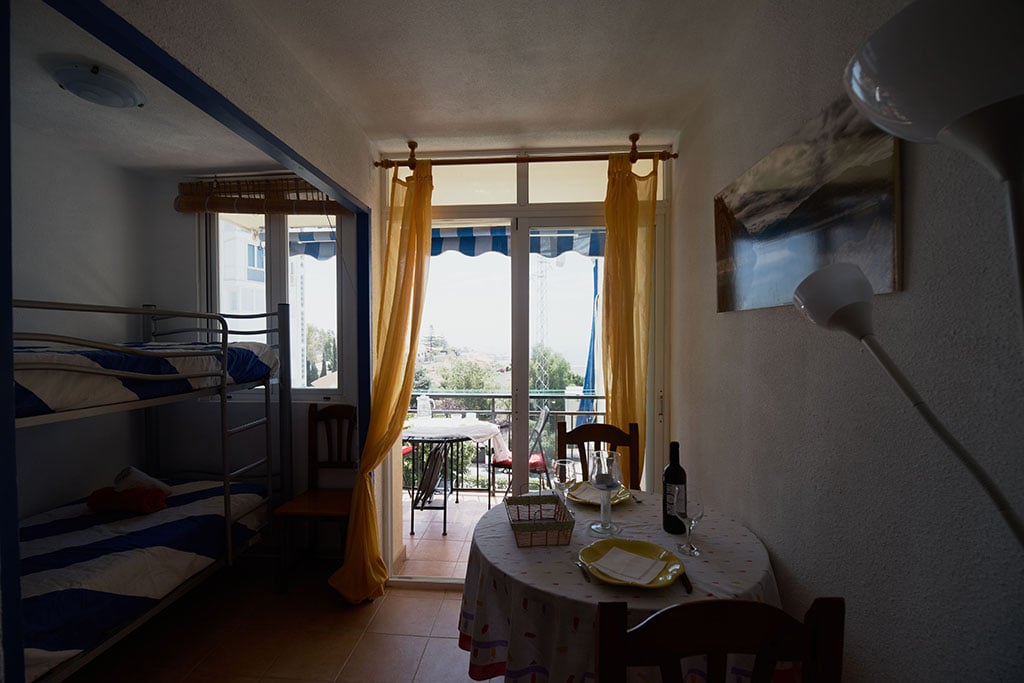 Photo 1 - ISO 200 - Aperture f: 4 - Speed set by the camera, 1/60 We obtain a balanced image without details in the shadows or highlights.
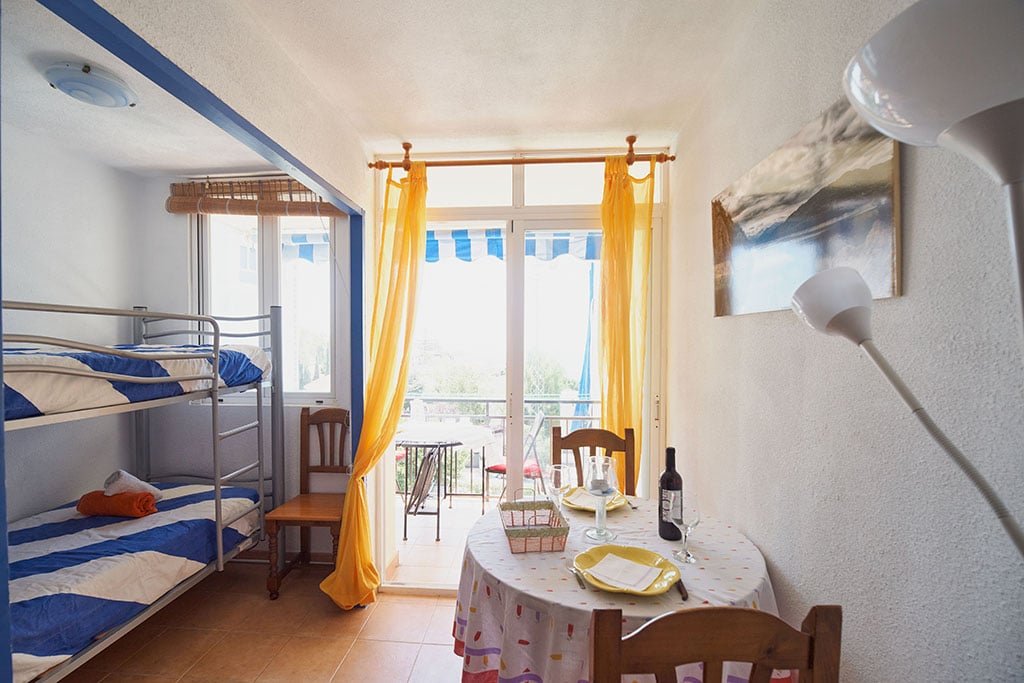 Photo 2 - ISO 200 - Aperture f: 4 - Manually set the speed to 1/15 Now the image is very clear, showing many details in the dark areas.
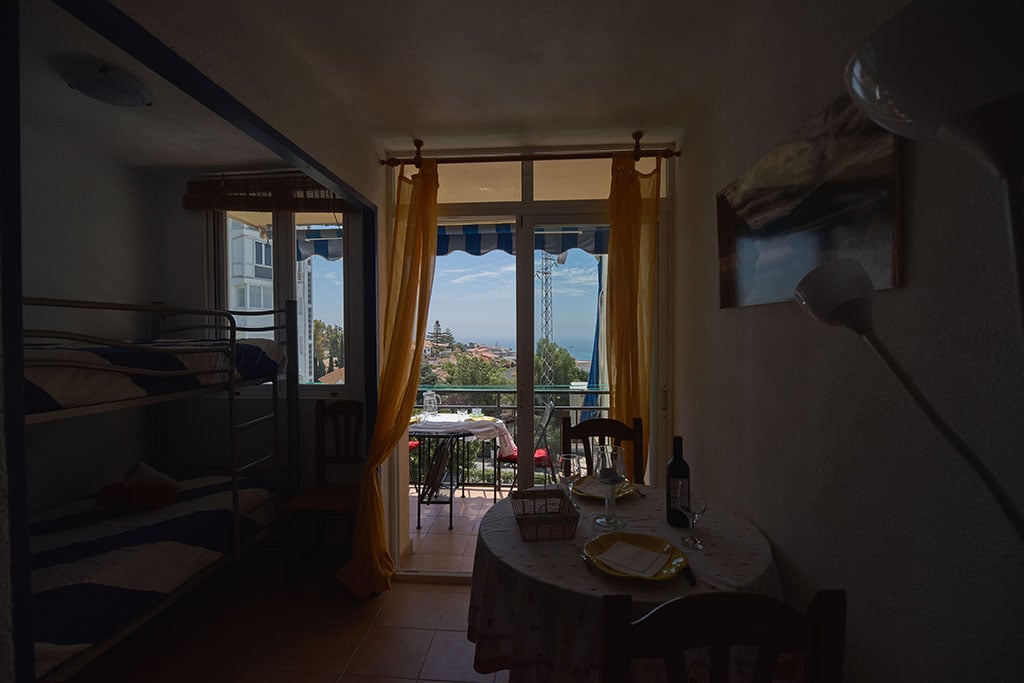 Photo 3 - ISO 200 - Aperture f: 4 - Manually set the speed to 1/250 Instead, the image is now very dark, showing only details in the highlights.
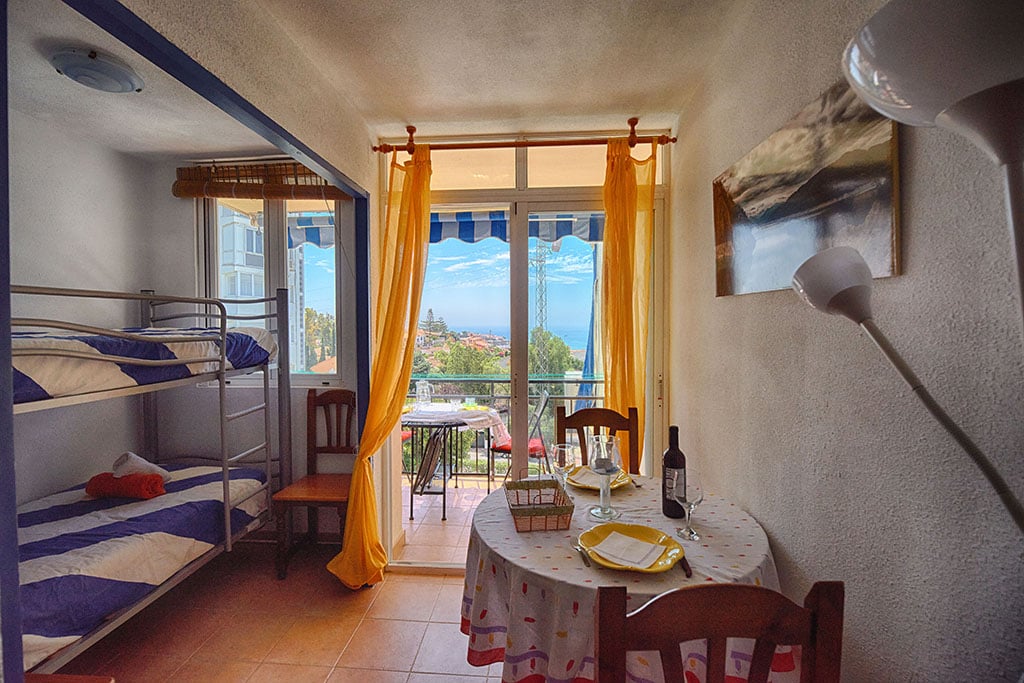
These three photos edited in the computer, and with the appropriate program are merged using the best of each one.
Modern cameras, and even some cell phones, have HDR programs built-in, but their results aren’t always the best.
You can find tutorials that explain in detail how to do this technique and which programs to use.
A captivating photograph is worth thousands of dollars
In today's world, where visual impact prevails, it is paramount that the listing images attract the potential buyer as they scroll. Once they pause to take a closer look, the selling process has begun! When you have made that sale, it turns out that the picture was not only worth a thousand words but also worth thousands of $ to your bottom line.
More about ListGlobally
ListGlobally operates the largest global network of property portals in the world, advertising across +100 property portals in +60 countries, reaching a monthly consumer audience of +200 Million potential buyers.
Questions? We invite you to reach out to us or open a chat with us on listglobally.com.
Contact our ListGlobally Team and we will help you get started with your enhanced global marketing strategy.
If you are a Real Estate Professional or property seller and you’d like to expand your international network, advertise, or engage with international property buyers, contact us at ListGlobally.
